

Cover: focal point, layouts, font
In short: open Cover in the settings. Pick the photo, put the focal point on what matters, choose a Layout and a Title font. The preview on the right shows the result on a computer and a phone.
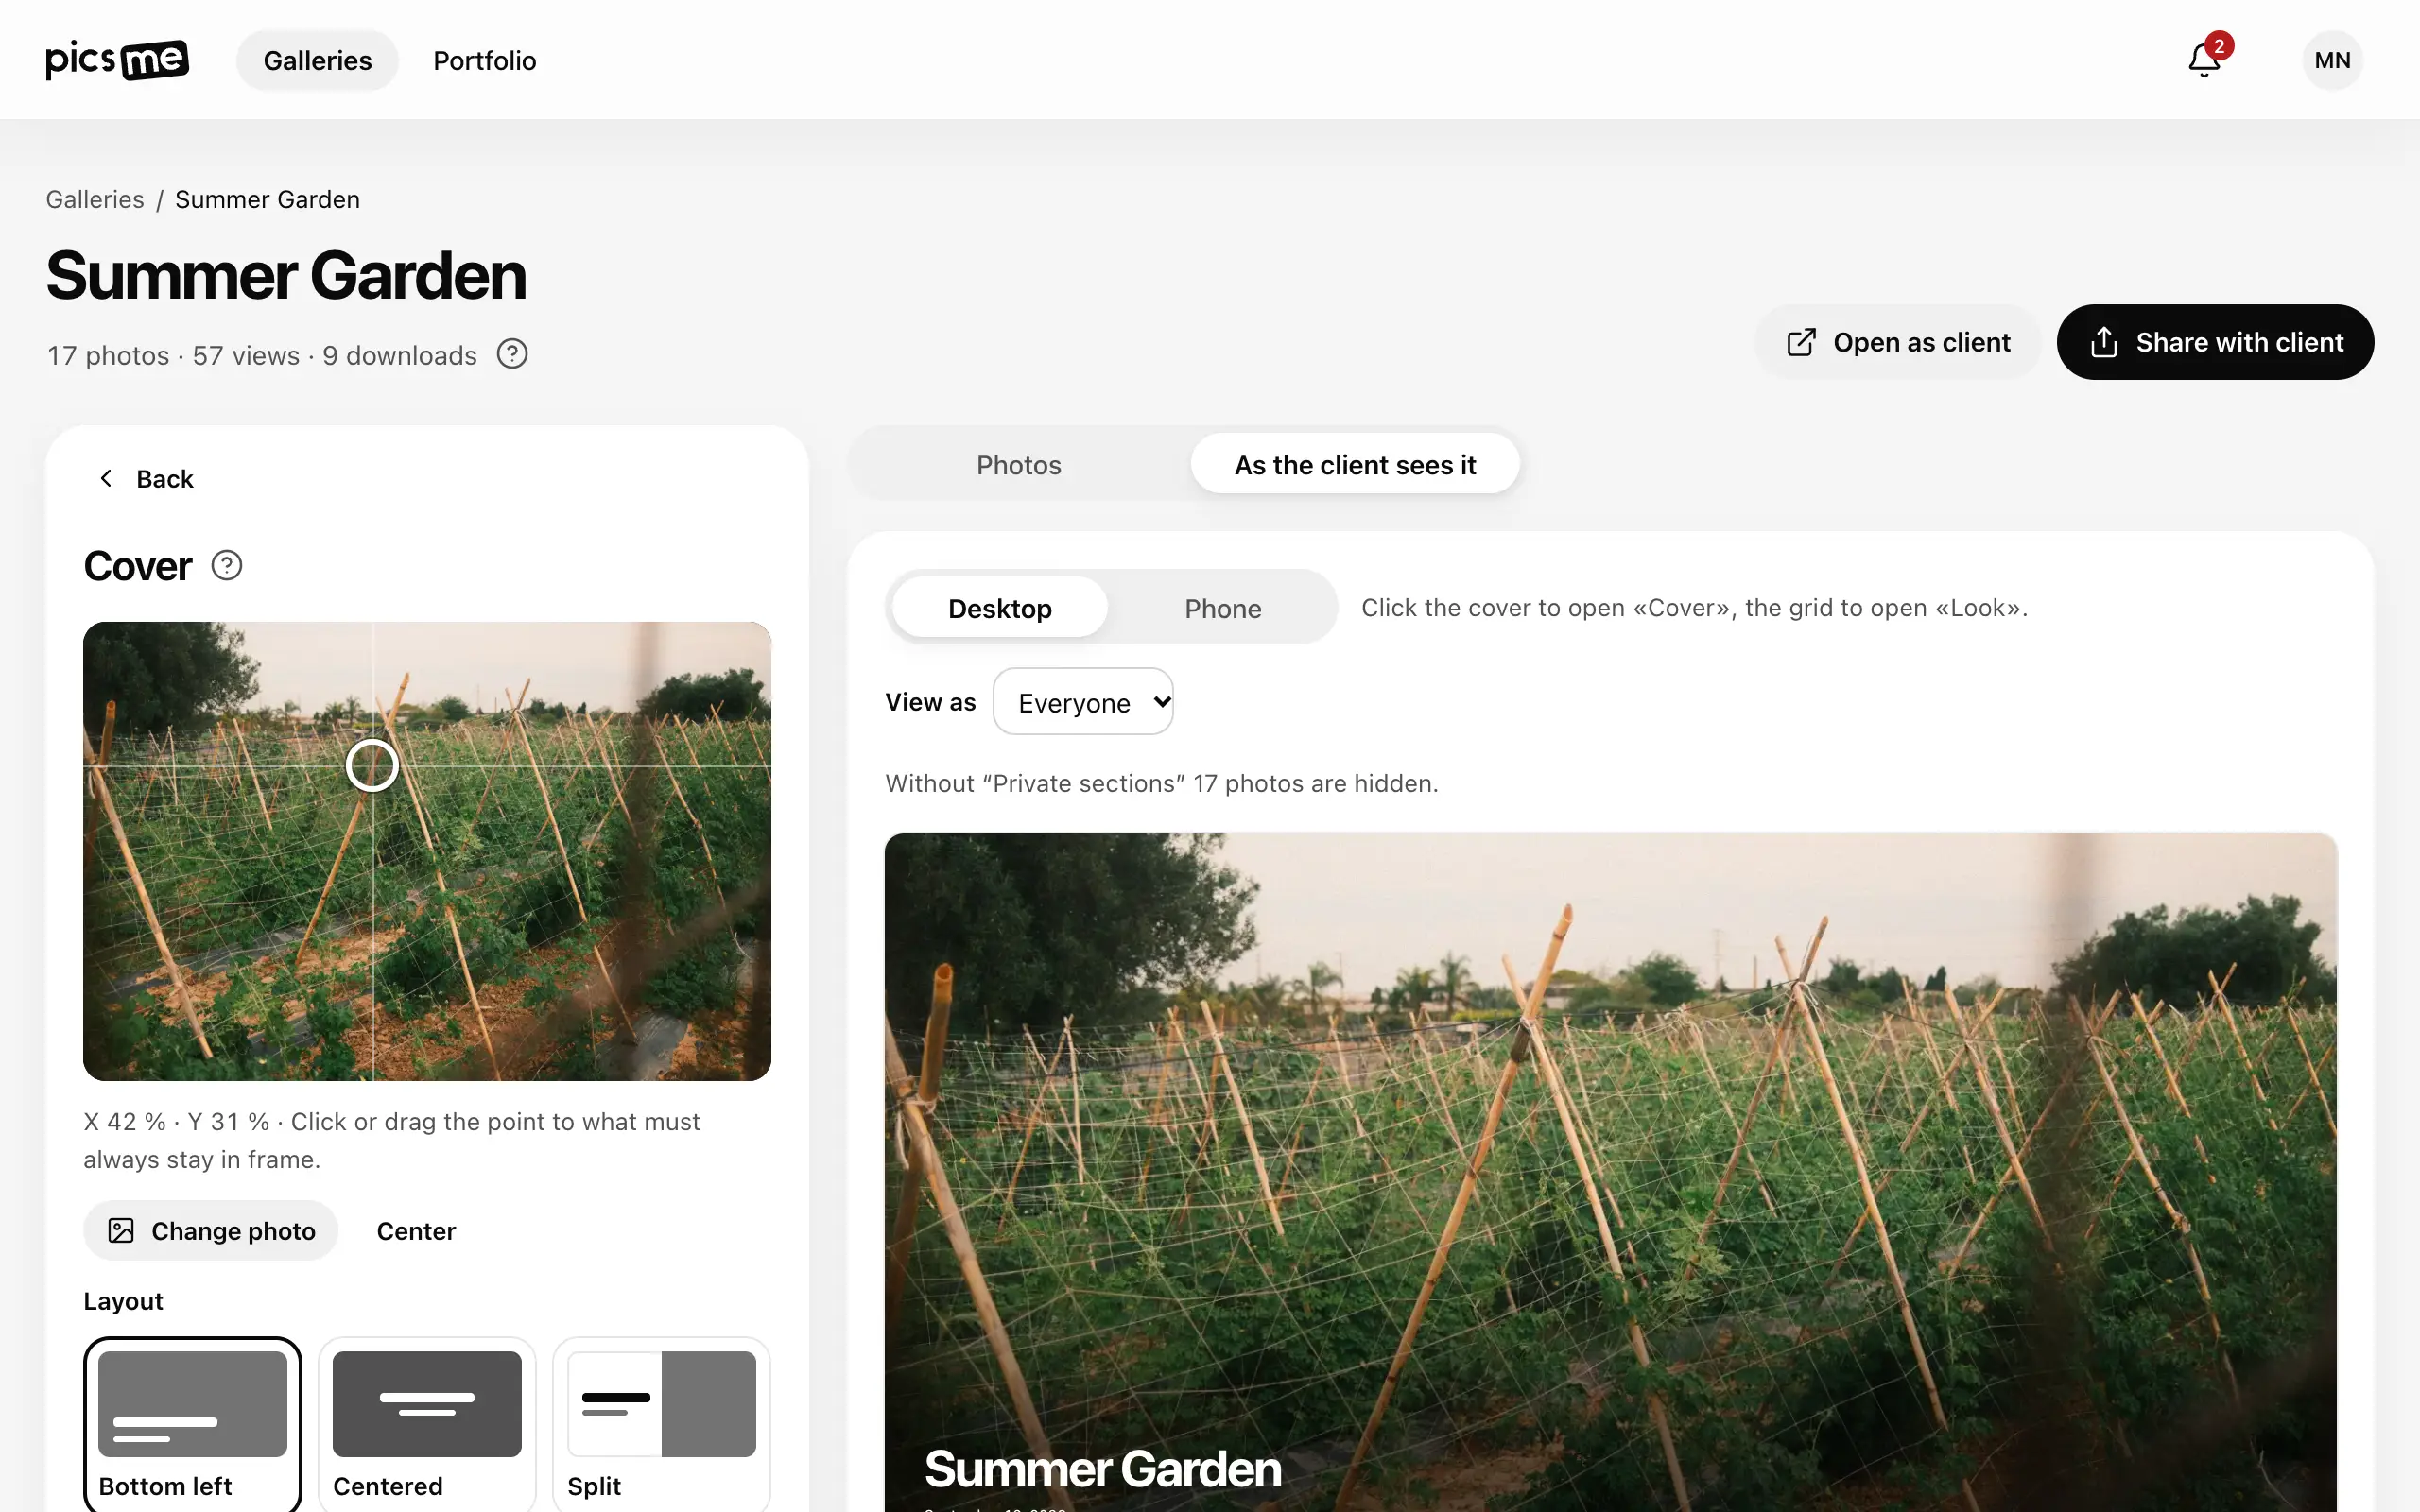
- Open the gallery and click Cover on the left. The preview switches to As the client sees it.
- Change photo — pick any ready photo of the gallery. Until you do, the cover is the first photo.
- Focal point — click the photo or drag the dot onto what must always stay in frame (faces, the couple). A phone crops the cover tall, a computer crops it wide: the focal point stays visible on both. Arrow keys move the dot, Shift + arrows move it further, Enter saves. Center puts it back in the middle.
- Layout — where the title sits: Bottom left and Centered (over the photo), Split (photo and title side by side; on a phone one above the other) or Frame (the photo with a margin, the title under it).
- Title font — System or Serif.
- Switch the preview between Desktop and Phone to check both.
Every change saves on its own; Cancel in the Saved notice puts the previous one back.
What the cover shows
Section titled “What the cover shows”The gallery title, the Shoot date (if set), your name and, if you allow it, your profile photo — plus the View gallery button. Its text follows the gallery’s Client language (in General).
If it didn’t work
Section titled “If it didn’t work”- The cover is a grey box. There are no ready photos yet: it appears after the first one.
- A face is cut off on the phone. Move the focal point onto the face and check Phone in the preview.