

Create a gallery and upload photos
In short: New gallery → title, access and term → Create and upload photos, then drag the photos in. Everything you choose here can be changed later.
Create the gallery
Section titled “Create the gallery”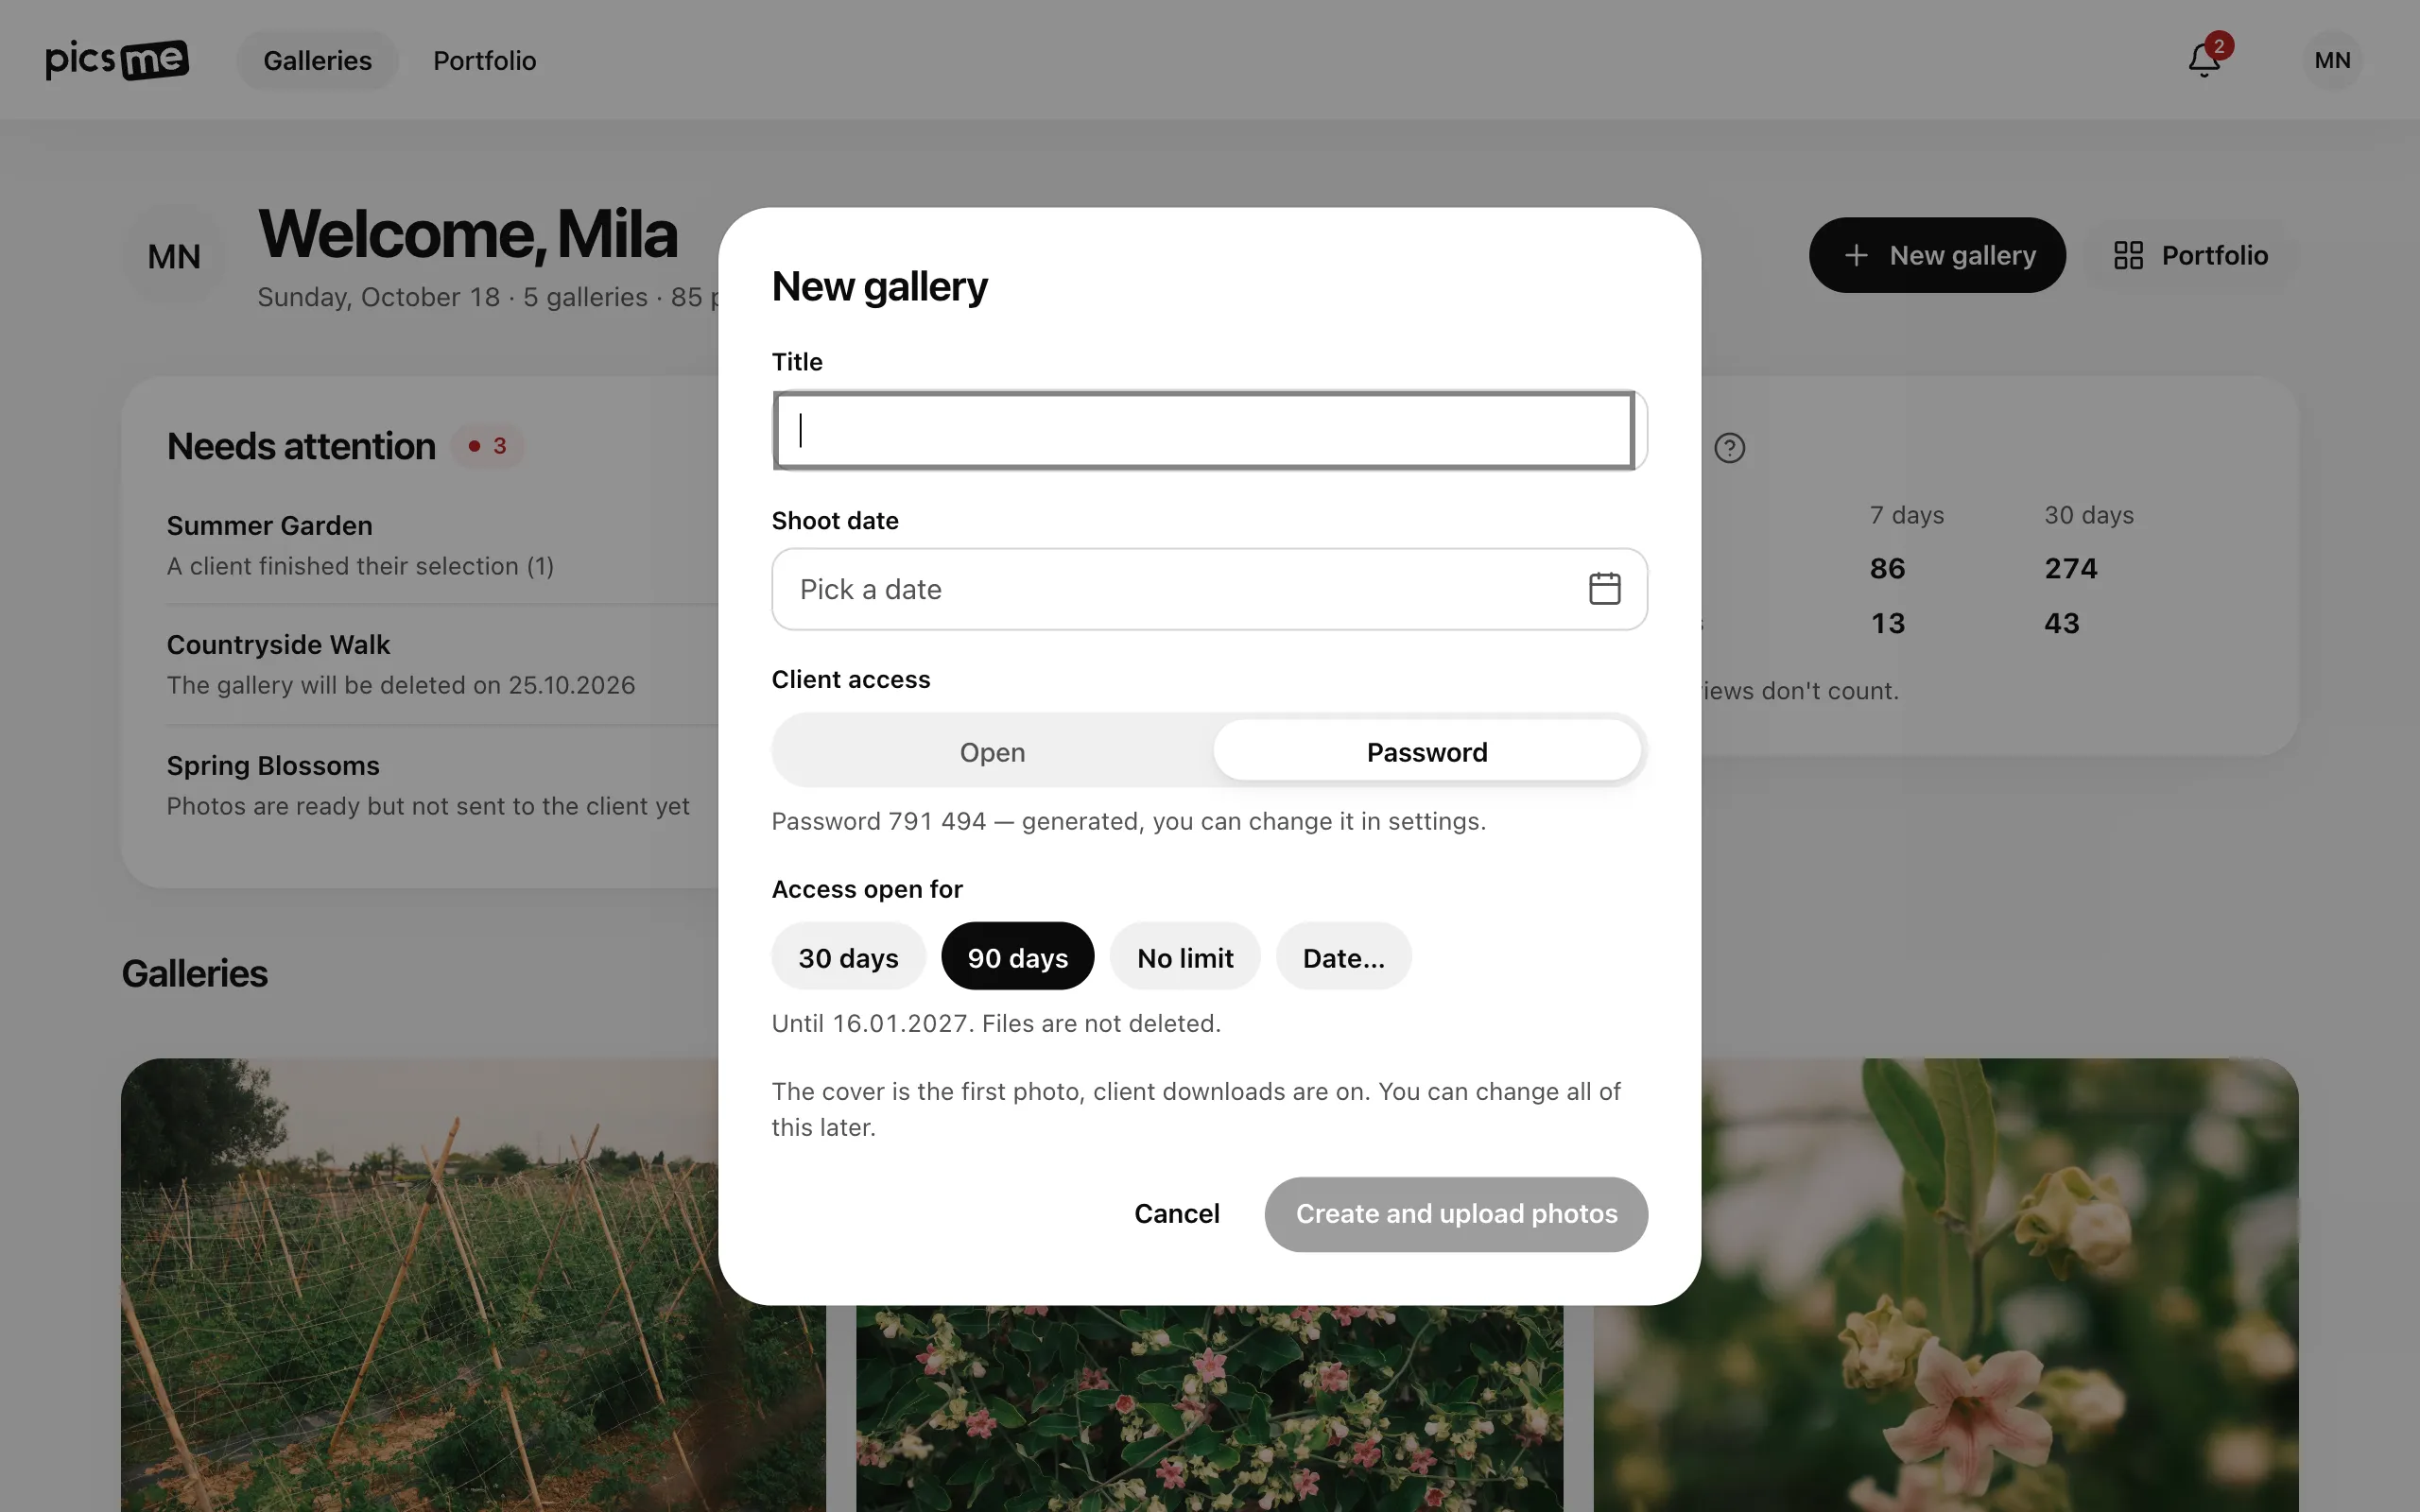
- On Galleries (or on the home page), click New gallery.
- Enter the Title. Shoot date is optional: it shows on the cover.
- Under Client access, choose Open (link only) or Password. A 6-digit password is generated for you; you can change it later in Access.
- Under Access open for, choose 30 days, 90 days, No limit or Date…. When access ends, the client sees “Access ended”; files are not deleted. See Access-until and delete-on dates.
- Click Create and upload photos. The gallery opens at the upload zone.
A new gallery uses the first photo as the cover and has client downloads on.
Upload photos
Section titled “Upload photos”- Drag photos onto Drag photos here or choose files, or click it to pick files.
- To upload into a section, click the section in the row above the grid first. See Sections and private sections.
- Watch the bar Uploading: N of M. You can open settings meanwhile — the upload keeps going. Cancel stops it.
- Each photo shows Processing… for a moment, then appears in the grid. New photos go to the end, in the order you picked them.
- To look at a photo full screen, double-click it (on a phone, tap it). See Ordering photos.
If it didn’t work
Section titled “If it didn’t work”- A file was refused. Check Supported files and limits.
- The upload stopped or a photo shows “Failed”. See Interrupted uploads and processing errors.